Disclaimer: The code and information provided in this blog post are for educational purposes only. Use them at your own risk. I am not responsible for any damage, loss, or issues caused by the use of this code or advice.
Introduction
This post explains how to simplify and automate the download of Oracle Database and Grid patches for supported platforms from a windows PC using PowerShell.
Using a GUI Interface or with a single CLI command we can download patches for both Database and Grid (At the time of writing only 19c is supported and versions 19.24 or higher)
Launch GUI using command:
Show-OraPatchDownloadGUI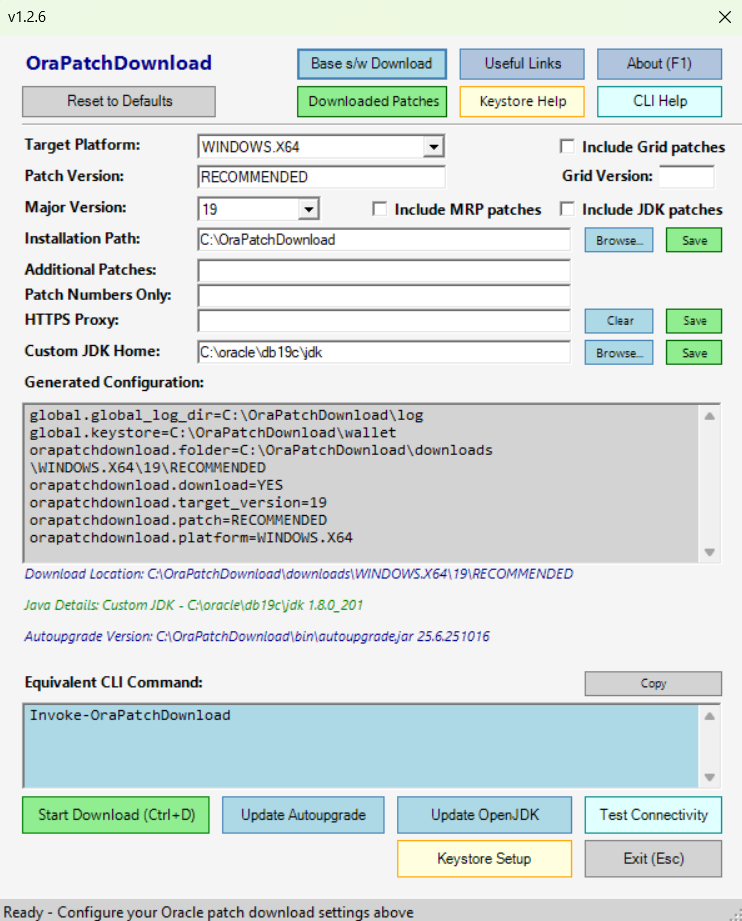
Use CLI interface to down patches:
Invoke-OraPatchDownload
    [-Platform <WINDOWS.X64|AIX.x64|ARM.x64|LINUX.X64|SOLARIS.x64|SPARC.x64>]
    [-PatchVersion <Major.Minor|RECOMMENDED>]
    [-MajorVersion <int>]
    [-OraPatchDownloadBase <string>]
    [-Grid]
    [-PatchNumber <string>]
    [-PatchNumberOnly <string>]
    [-LogPath <string>]
    [-JdkHome <string>]
    [-JDK]
    [-MRP]
Examples
For all examples ensure the One Off Setup has been completed, this is documented after the usage examples.
- Start PowerShell as Administrator
- Type PowerShell in search box on windows
- Right click “Windows PowerShell” and “Run as Administrator”
- May need to run import-module if module is not in default path using:
Import-Module OraPatchDownloadCLI examples also below (all of which can be performed intuitively from GUI)
Example 1: Download 19.27 RU patches for database and grid on Linux X64:
Invoke-OraPatchDownload -patchVersion 19.27 -Platform LINUX.X64 -gridExample 2: Download latest recommended database patches only for Windows (options default to Windows, so running command with no arguments will download Windows recommended patches for 19c)
- Noticed if using Recommended and latest patch is not fully available nothing will get downloaded so if this happens specify version i.e 19.28 rather than RECOMMENDED it will work

Invoke-OraPatchDownloadExample 3: Download single patch on Windows for 19.28 JDK which is 37860476
Invoke-OraPatchDownload -Platform WINDOWS.X64 -PatchVersion 19.28 -PatchNumberOnly 37860476Example 4: Download 19.27 RU patches for database and 19.28 grid on Linux X64
Invoke-OraPatchDownload -patchVersion 19.27 -Platform LINUX.X64 -grid -GridVersion 19.28Setup
- You will need an “My Oracle Support” logon that permits patch downloads
- Requires an Oracle Support contract in place
- Have your username and password at hand to perform setup
- Oracle Patch downloads utilises Oracle’s Autoupgrade.jar, this requires access to Java
- You can use your own Java/JDK installation
- The code will implicitly download and install Adoptium OpenJDK if you don’t have your own Java/JDK installed
- An Oracle Wallet is needed to store Oracle credentials
- This is a secure method to store credentials
- The code will launch Autoupgrade tool to allow you to do this one off setup
- Start PowerShell as Administrator
- Type PowerShell in search box on windows
- Right click “Windows PowerShell” and “Run as Administrator”
Setup Part 1 : Install and Import OraclePatchingAutoupgrade PowerShell module
Install-Module -Name OraPatchDownload -Force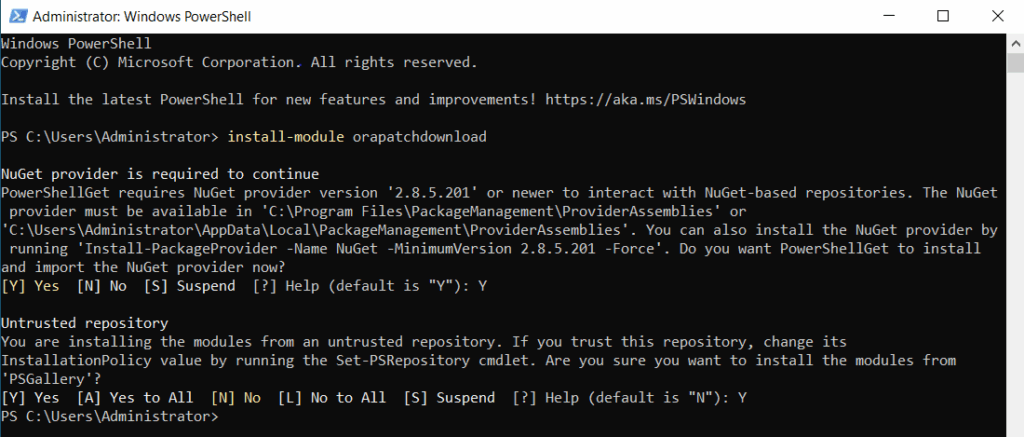
- Have observed this command taking a while to respond, be patient
- Hit return to make sure prompt not entered interactive mode
- You may get prompted to Install NuGet, accept this
- If Install-Module command is missing you can install or update PowerShellGet to permit this, followed by a PowerShell session restart, using 2 commands below, then retry.
Install-PackageProvider -Name NuGet -Force -Scope CurrentUserInstall-Module -Name PowerShellGet -Force -Scope CurrentUserSetup Part 2 : Directory Setup and Software Downloads (OpenJDK and Autoupgrade)
*The process requires access to Java to download patches, you have the option of using a version of JDK/Java already installed on your system OR downloading OpenJDK implicitly if no java is selected. So Java/JDK is needed but if not installed or available is implicitly downloaded as part of keystore setup.
The default Java/JDK can be set at command line using:
Set-OraPatchJDKHome -JdkHome <"JDKHome">Or in GUI setting and saving Java/JDK home.
Start GUI using : May need to run import-module OraPatchDownload if module is not in default path
Show-OraPatchDownloadGUI
On the GUI select “Keystore Setup”
Or use CLI command “New-OraPatchKeyStore [-JdkHome <string>]”
- Creates Directory Framework
- <Base DIR>
- bin : autoupgrade.jar
- cfg : autoupgrade cfg files
- downloads : patches
- log : logs
- OpenJDK : Java
- Wallet : credential keystore
- <Base DIR>
- Downloads and unzips Adoptium OpenJDK by default unless using your own JDK
- Downloads Oracle Autoupgrade.jar
- Allow 30 minutes as software is being downloaded
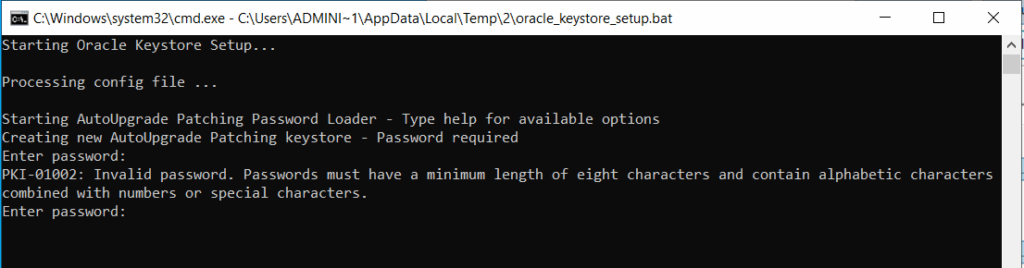
One off Oracle Keystore wallet to hold MOS credentials
- If using GUI a command shell will open for this
- You will need to provide a password to secure the keystore
- This password is not used again as wallet will be created to use SSO
- You can rerun this step if issues
- Now we are in an interactive mode for Autoupgrade
- Manually add your My Oracle Support Account Username and Password
add -user <MOS email address>- Confirm credentials are valid using below command
- If wrong repeat step to add -user <MOS email address>
- “list” command will confirm credentials entered are working
- repeat add -user command if it does not work
- Save Configuration using exit and answer YES to convert to auto-login
listsaveexit
We are now setup to download patches.
“What if I told you it was possible to patch single instance Oracle on Windows either using in place or out of place patching with a single command”