How to Sign up for Snowflake Warehouse Account
1. Cost Considerations
Snowflake Warehouse free trial account provides:
- 30 days free access
- $400 of credit to consume
Snowflake charges for Compute (CPU) + Compressed Storage (Where our database is stored)*
What does $400 of credit equal: https://www.snowflake.com/pricing/
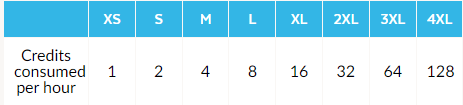
- Example Enterprise Edition Compute consumes credits:
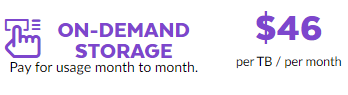
- Example Storage Using Cloud Provider MS Azure running in Region Canada Central is priced at:
*Other charges which can be review in link above, but for purpose of a trial account to learn, compute + storage will be out main credit consumers
Cost Concerns:
- The trial account is usable while there still remains credit or within the 30 days limit
- unless we go crazy with our Compute and Storage sizes $400 is a fair amount of free credit
- I’ve completed all the free workshops and my usage was nowhere $400 limit
- At no point will you be requested for credit card details during the process
- If you consume all of your free credit or go past free 30 day period you can add payment details and change to a paid account at own risk
2. SIGN UP INTERFACE
Go to signup URL : https://signup.snowflake.com/
Any issues with signup email : support@snowflake.com
3. Enter details requested (update to your details)
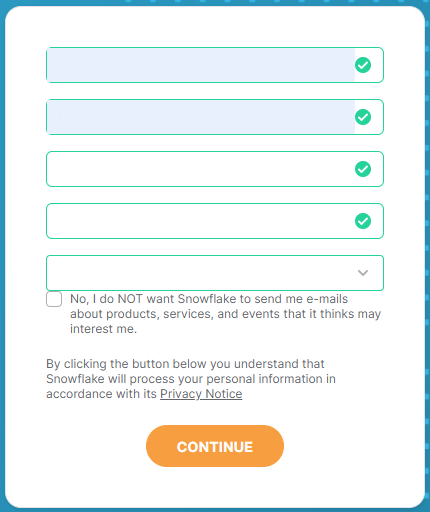
Click ‘CONTINUE’ to proceed to next screen
4. Operating Environment
- For the tutorial and learning snowflakes recommends: Enterprise
- This can’t be changed after account creation without contacting support
- Note Google (GCP) is a fairly new addition to Snowflake, so maybe missing features and functionality
- Don’t need knowledge of Cloud Provider as Snowflake application is the interface
- Gaining Snowflake Course Badge 2 requires: Mircosoft Azure, Region Canada Central(Toronto)
- Gaining Snowflake Course Badge 3 requires: Google Cloud Platform, Region Any
*Note the Cloud Provider and Region can’t be changed after creation, but you can have multiple accounts using the same registered email address.
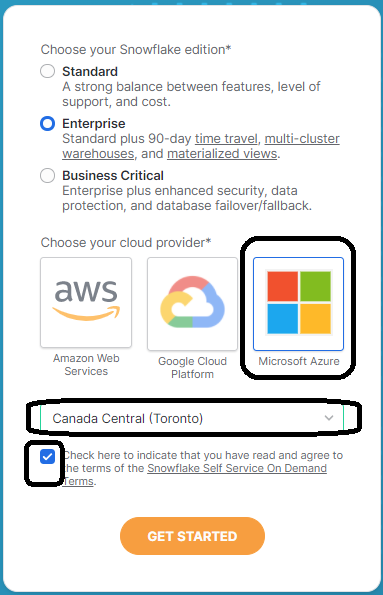
Click ‘GET STARTED’ to proceed to next screen
5. Sign up completed
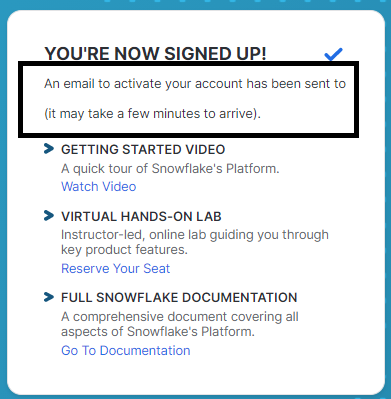
Check for activation email, this may go to junk folder by default as it did for me.
6. Check for activation mail which may take several minutes
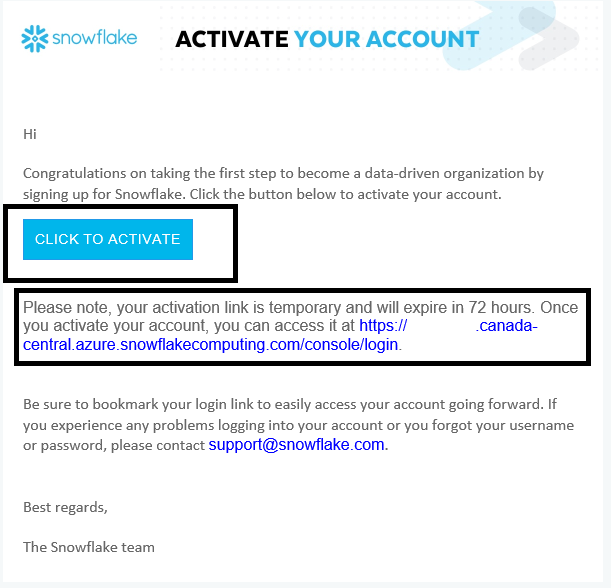
Click Activation Link
Note Sign on URL for snowflake and bookmark

The activation link will request an account setup as below:
Username: <username>
Password: <password>
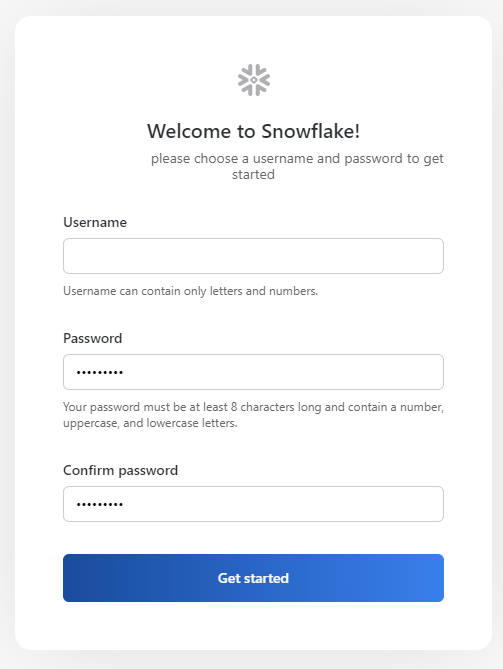
Click ‘Get started’
7. SnowFlake webUI
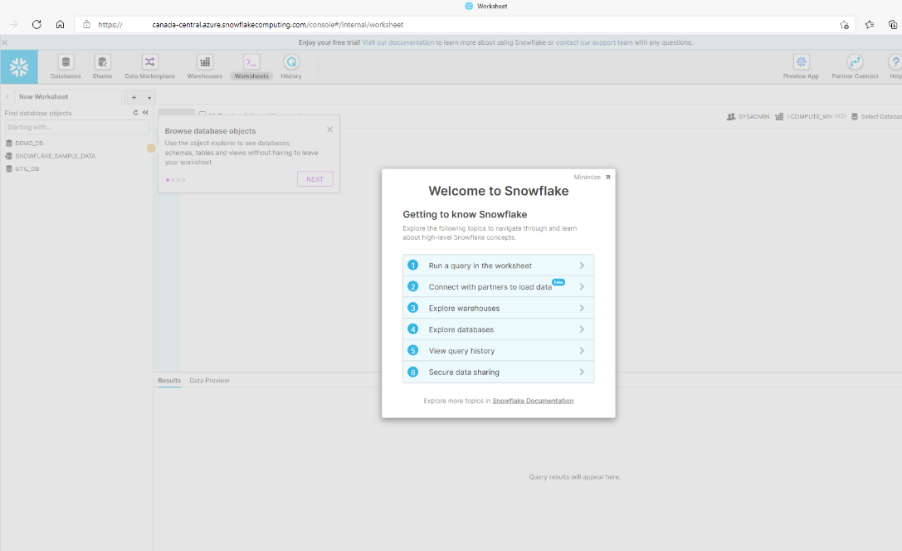
After we provide username and passwords we are taken to Snowflake webUI to start learning.
To log back in at any time, we just use URL from activation email which should have been bookmarked.

This interface is known as the ‘Classic Console’
If you did choose AWS or Azure as a cloud provider you can also preview the new Snowsight interface (Preview App option on navigation screen)
8. Checking Credits used
To review Credits consumed follow below: Select your NAME -> Switch Role to ACCOUNTADMIN
-> Click Account icon on navigation bar -> review credits used

9. Tips
- The Snowflake Edition that you chooses determines the unit costs for the credits and data storage
- How do I find my account link?
- Your account link can be found in your activation email. Be sure to bookmark this link.
- To prevent unintentional usage of your free credits
- Size of your virtual warehouses to small or extra small
- Set warehouses to suspend after a short time period (e.g. 5 minutes or less)
- Use MS Azure, Canada Central(Toronto) if you plan to do Sharing, Marketplan & Exchange workshops
- Use Google Cloud Platform, if you plan to do Data Application Builders workshop.
10. Additional links
https://docs.snowflake.com/en/
https://www.snowflake.com/trial_faqs
https://docs.snowflake.com/en/user-guide/admin-trial-account.html
https://docs.snowflake.com/en/user-guide/intro-editions.html