This is intended to be a 2 PART article, PART 1 will setup and install Oracle XE 18C, PART 2 will then setup and configure Oracle Apex to use the Oracle XE 18C database.
In this article we are going to setup and install the infrastructure to run Oracle XE 18c, all the components used will be free to use and download, and tested on a Windows 10 laptop, but should be adaptable to other setups with little effort.
Our infrastructure will comprise of a windows laptop with over 4 GB of RAM free, and 2 CPU’s given to our virtual machine which we create using Virtual Box software to run the Linux OS Centos 7 and Oracle XE 18c.

| Component | Download URL | Size (MB) |
| Oracle Virtual Box 5.2 | https://www.virtualbox.org/wiki/Downloads | 109 |
| CentOS 7.5 | https://www.centos.org/download | 4263 |
| Oracle 18c XE | https://www.oracle.com/database/technologies/appdev/xe.html | 2455 |
| Oracle Pre Install RPMFor Release 7 | https://www.oracle.com/database/technologies/appdev/xe.html | 1 |
Download these files to a common directory on your Windows PC, later this directory will be made shareable to our virtual machine so we can use these file for the install.
To download the Oracle software you will need to create an Oracle Account on their website first.
To download CentOS no account is needed, but you will be directed to a mirror site to perform the ISO DVD image download which may flag up warnings on your browser or defender software.
To download Virtual Box no account is needed.
Place these files in a common directory, I choose to use my D drive in ‘D:/ORACLE18c_SW’ as below:

This common directory will be made sharable to our virtual machine later on for the installs. Once you have downloaded all of the above software we can begin.
Installing and Set up Oracle VirtualBox 5.2
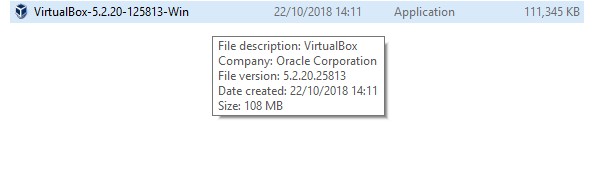
First step to download the Virtual using URL: https://www.virtualbox.org/wiki/Downloads
The downloaded file which in my case was ‘VirtualBox-5.2.20-125813-Win.exe’ should then be run with a DoubleClick to install the software by following the install wizard.

Click Next.

Accept defaults and click Next.

Accept defaults and click Next.

Click Yes.

Click Install.
Install will then proceed.
Click Finish to complete install and launch VirtualBox 5.2.
Create Virtual Machine

Click New cog on Top menu
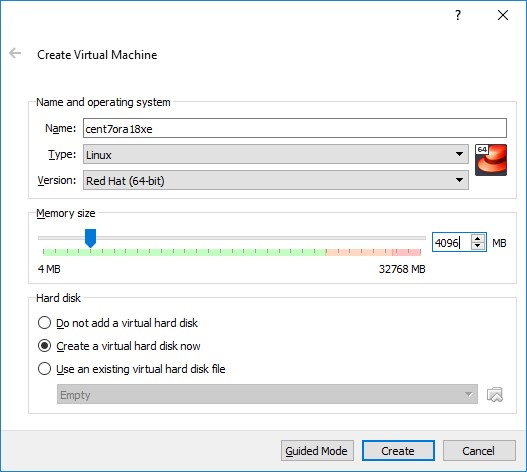
My machine will be called ‘cent7ora18xe’ so it’s easy to recognise, Type is Linux (for CentOS), version we are choosing Red Hat (64-bit), you can name machine anything as well.
I’ve allocated 4 GB of RAM to my virtual machine, we can change this later if needed.
Click Create.

On the Create Virtual Hard Disk page we allocate 40Gb of disk space, though notice this is ‘Dynamically allocated’ so it will grow and use space as needed i.e. it may start off at only 1Gb of size noticed used then as we use space on the Virtual Machine this file will grow up to 40 Gb.
I’ve also changed the default location of the disk file from the C drive to my D drive which is larger.
Click Create.
Now we see the new machine appear in the left hand pane:

Select the new Machine and click the Yellow ‘Settings’ Cog.

On System tab, Processor I’ve increased count to 2 (optional depending on you Host PC)

On Network we will allow access back to the Host and therefore Internet as well by adding a Network adaptor on the Network tab.

The adaptor name is that of one on your host PC or Laptop, above mine is a Qualcomm wireless adaptor, make sure this is enabled as well, and expand Advanced and note the MAC Address so we can relate this interface to the correct type during the CentOS installation.
We will also add a Network adaptor for Internal Network (or “Host-only Adapter”) using Adaptor 2

Again note the MAC Address so we can relate this interface to the correct type during the CentOS installation.

On the ‘Shared Folders’ tab I’ve added a path back to a folder where all my software is downloaded for Oracle XE 18c , rpm’s and Apex.

Lastly on the ‘Storage Tab’ I’ve added the location to the CentOS 7.5 ISO DVD image, this should boot when we start the machine next.
Click ‘OK’ to confirm all changes.
Installing CentOS 7.5
Let’s start our VM so we can proceed with CentOS 7.5 install, click Start to begin install.


Use Arrow Keys to select ‘Install CentOS 7’ and Press Return
If mouse lose focus as on screen above press ‘Right CTRL’ to return mouse focus back to host PC.

Will be lots of boot messages which is ok after which the GUI install will launch.

Choose language setting appropriate for you, I’ve chosen English-> United Kingdom
Click Continue

Select: SOFTWARE SELECTION
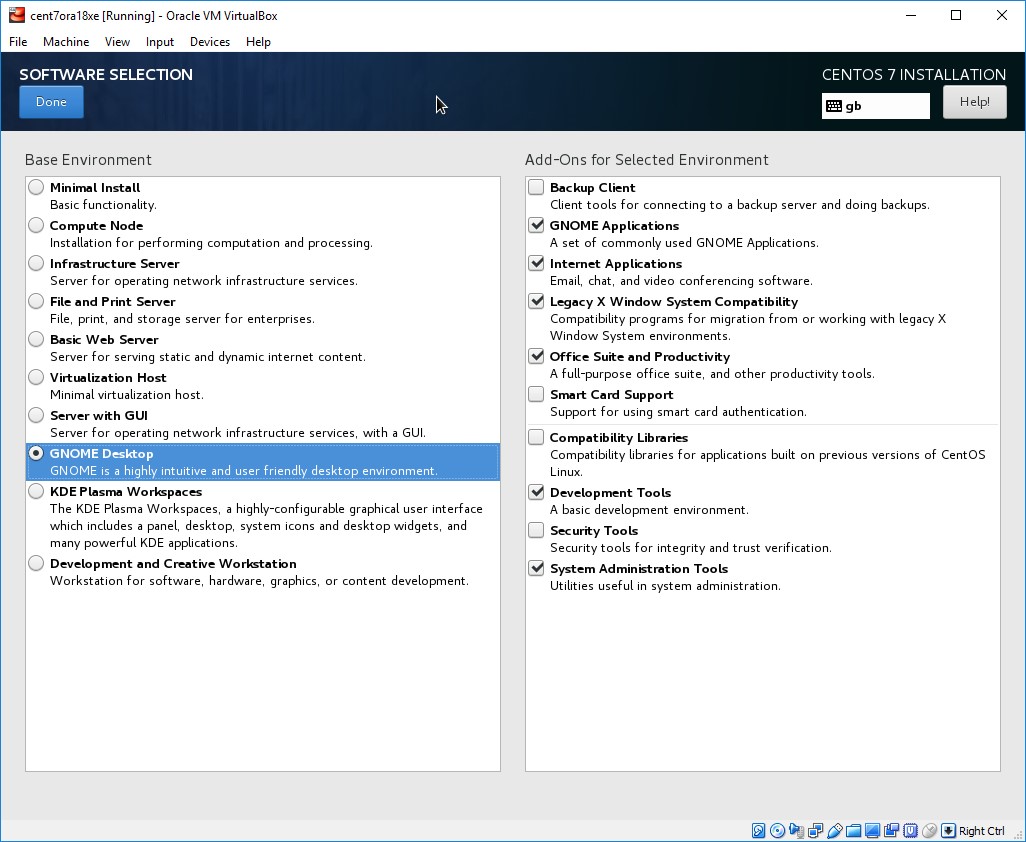
Choose GNOME Desktop with above Add-Ons
-          GNOME Applications
-          Internet Applications
-          Legacy X Windows System Compatibility
-          Office Suite and Productivity
-          Development Tools
-          System Administration Tools
A dependency check will then run for a few minutes.
Select ‘INSTALLATION DESTIINATION’
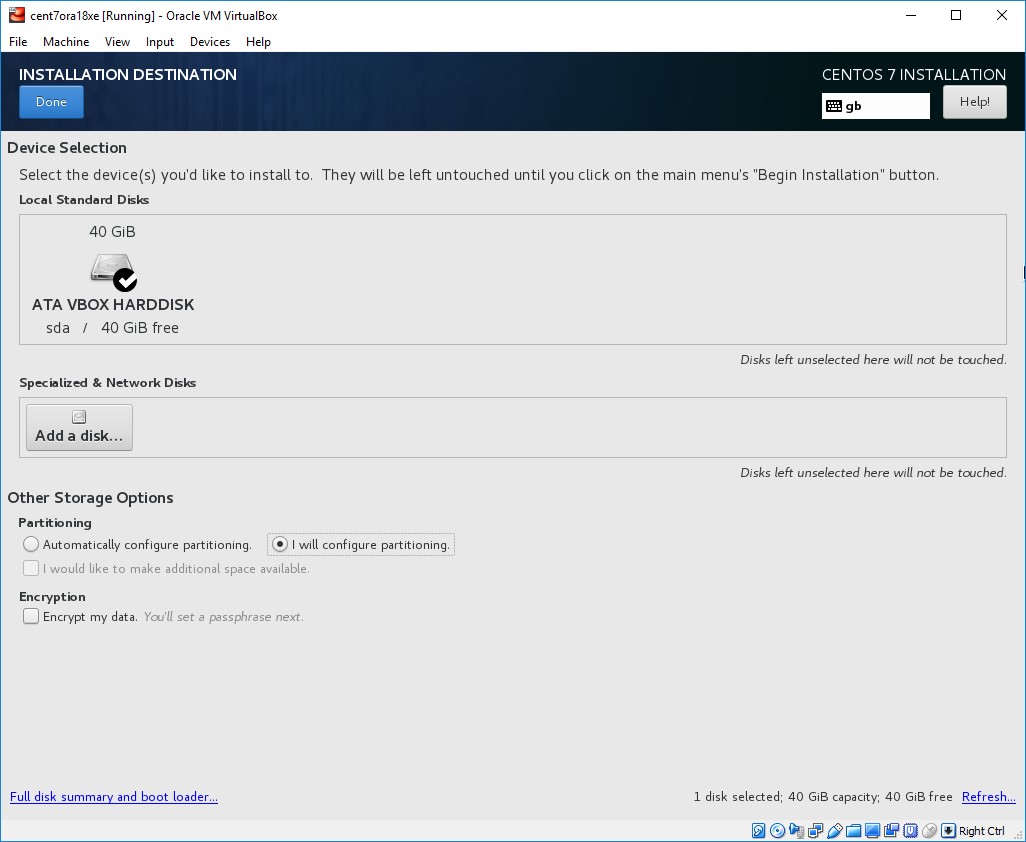
Select ‘I will configure partitioning’ so we can review and change if needed.
Click ‘Done’
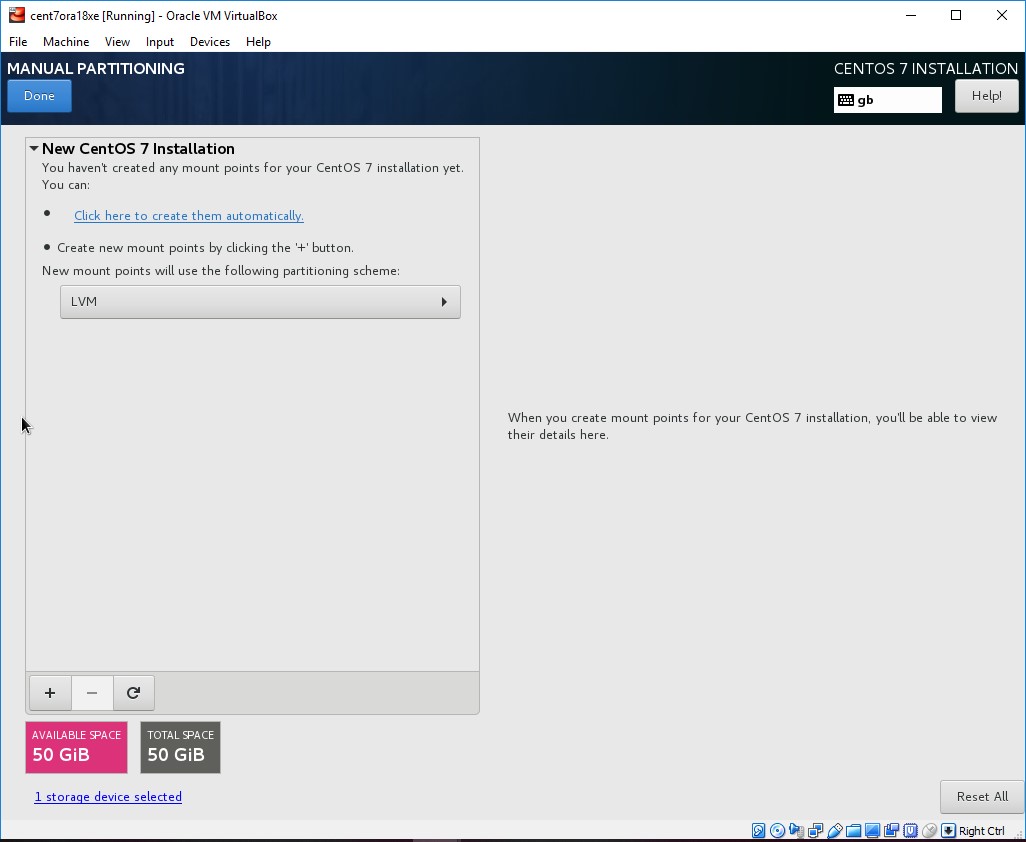
Click ‘Click here to create them automatically’
We will reduce ‘/’ mount to approx. 10 GB, then create a separate mount for Oracle XE 18C s/w and database.
Select ‘/’, reduce ‘Desired Capacity’ to ‘10 GiB’, click Update Settings

Next we will click ‘+’ to add ‘/opt’ with a size of ’35 Gib’

Click ‘Add mount point’
Click ‘Done’ in to left hand screen

Click ‘Accept Changes’
Select ‘NETWORK & HOST NAME’

There are 2 network adaptors, one for outside connectivity to the internet, the other for internal use.
We should have made a note of MAC Addresses when we created the Virtual Machine in the earlier steps (can check this at any time as well on the Virtual Box Settings)
For the Internet interface (Bridged adaptor) set the interface to ‘ON’
For the ‘Internal Network’ Adaptor highlight and select ‘Configure’
Select ‘IPv4 Settings’
Select Method ‘Manual’
Click ‘Add’
Configure as below: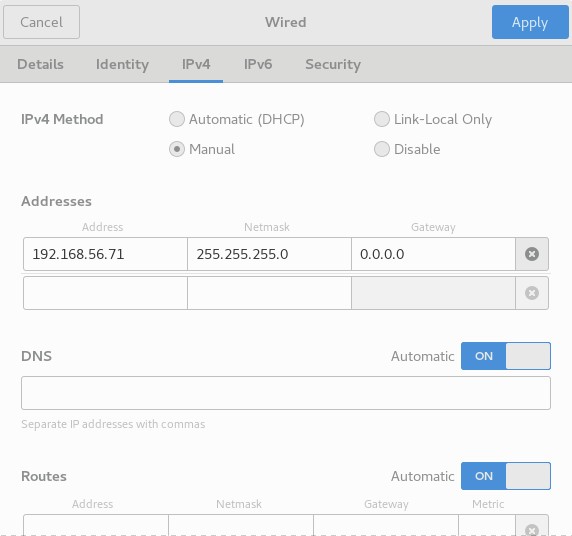
Set Ethernet Adaptor to ‘ON’
Enter hostname: centora1.localdomain
Click ‘Apply’
Click ‘Done’ in top left hand corner
Click ‘Begin Installation’ to start the install.

Click on ‘ROOT PASSWORD’ to set to password of your choice, for this demo we will use the password oracle123
Now wait for install phase to complete. (60 minutes, good time for tea break)

Click Reboot to complete installation phase.
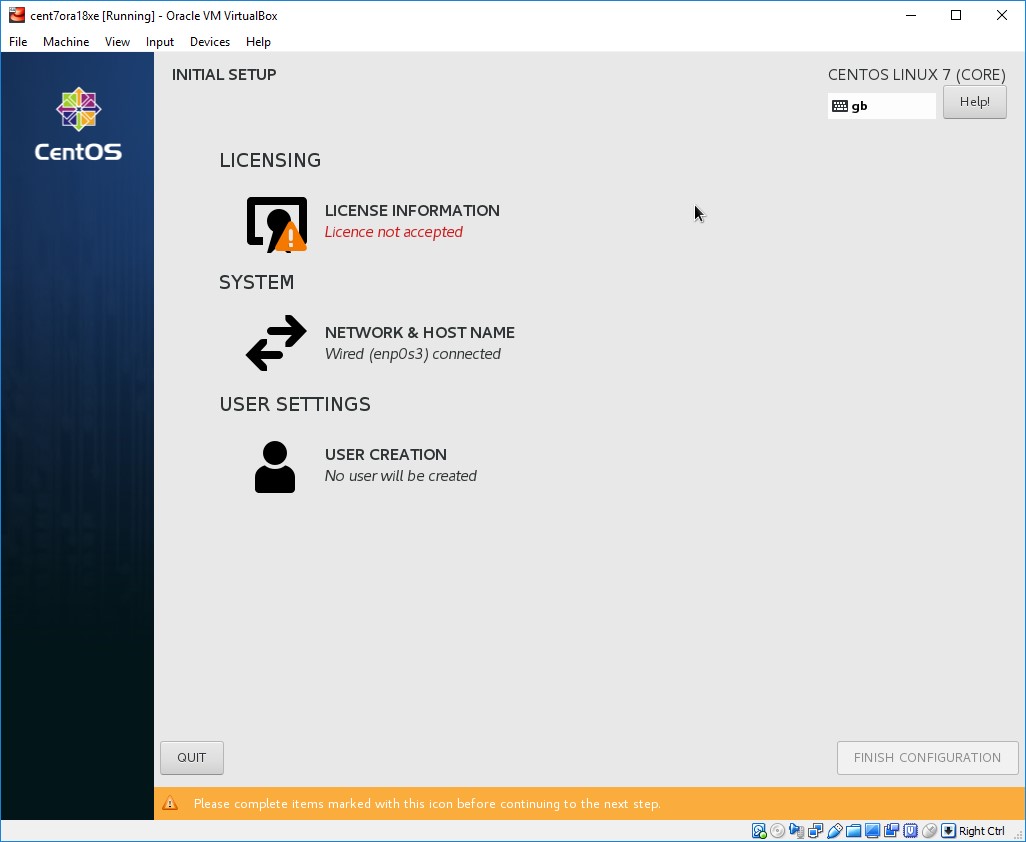
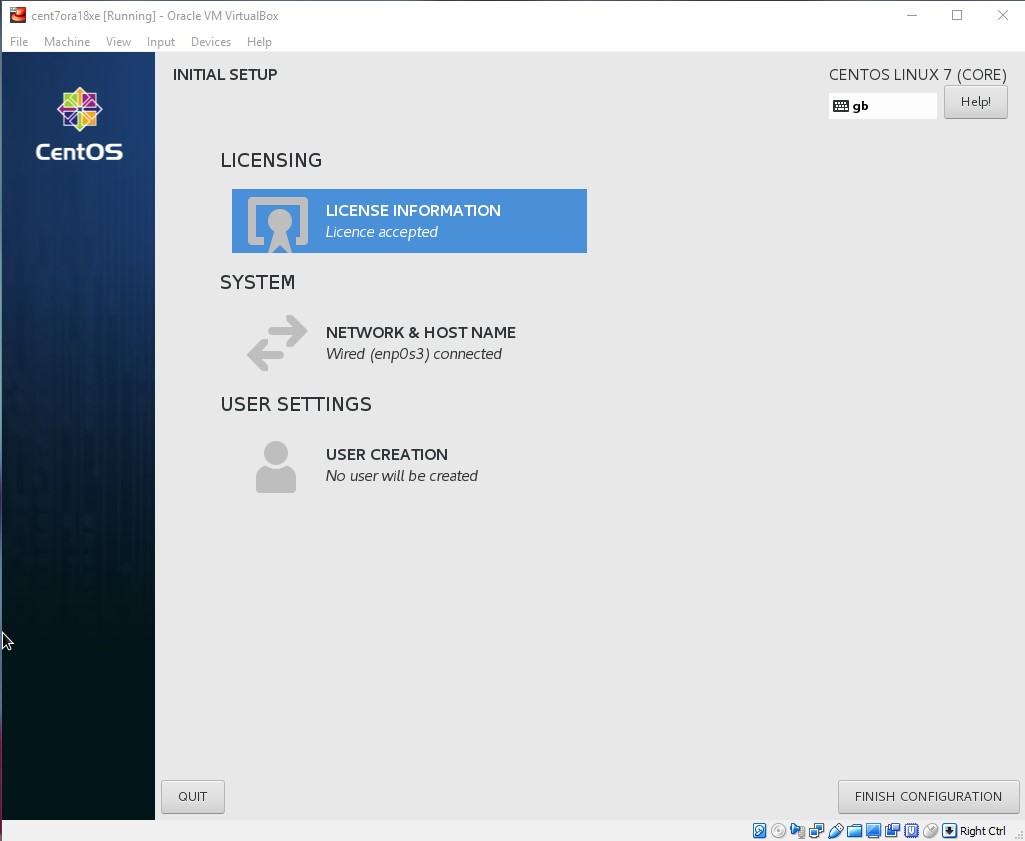
Click ‘LICENSING’ to complete license agreement.

Click ‘FINISH CONFIGURATION’
Click Next.
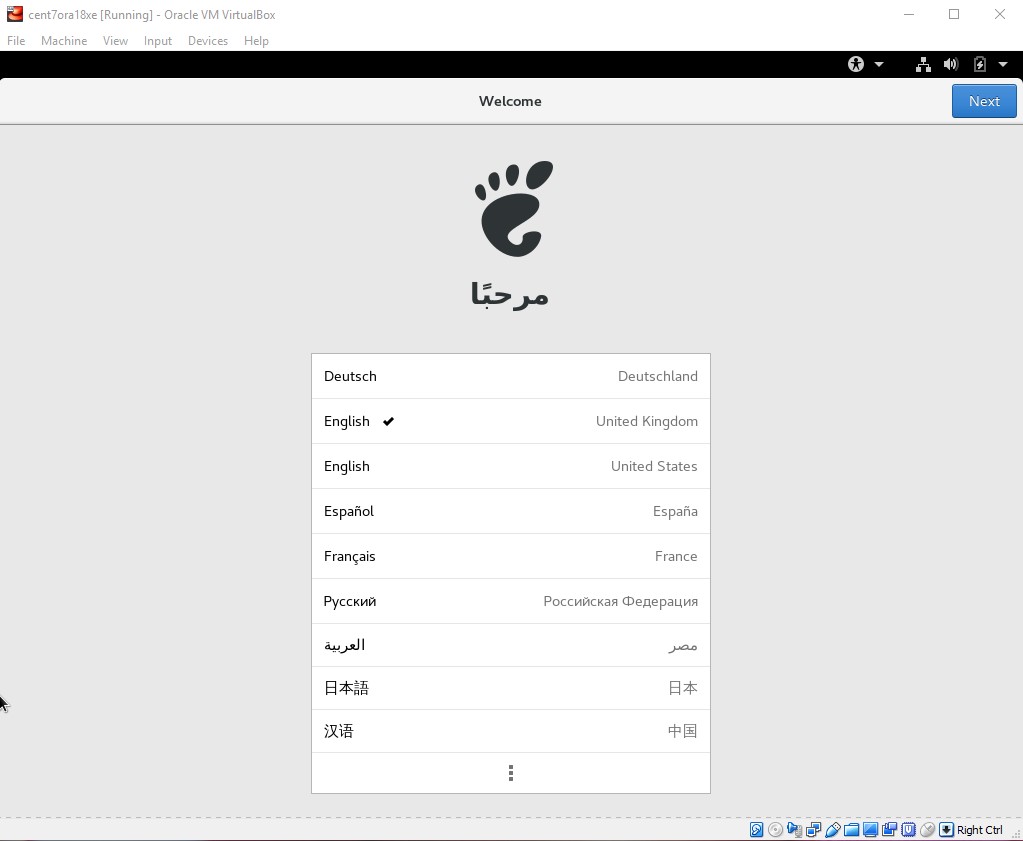
Click Next.

Set Location Services to ‘OFF’
Click Next.

Review and accept Time Zone.
Click Next.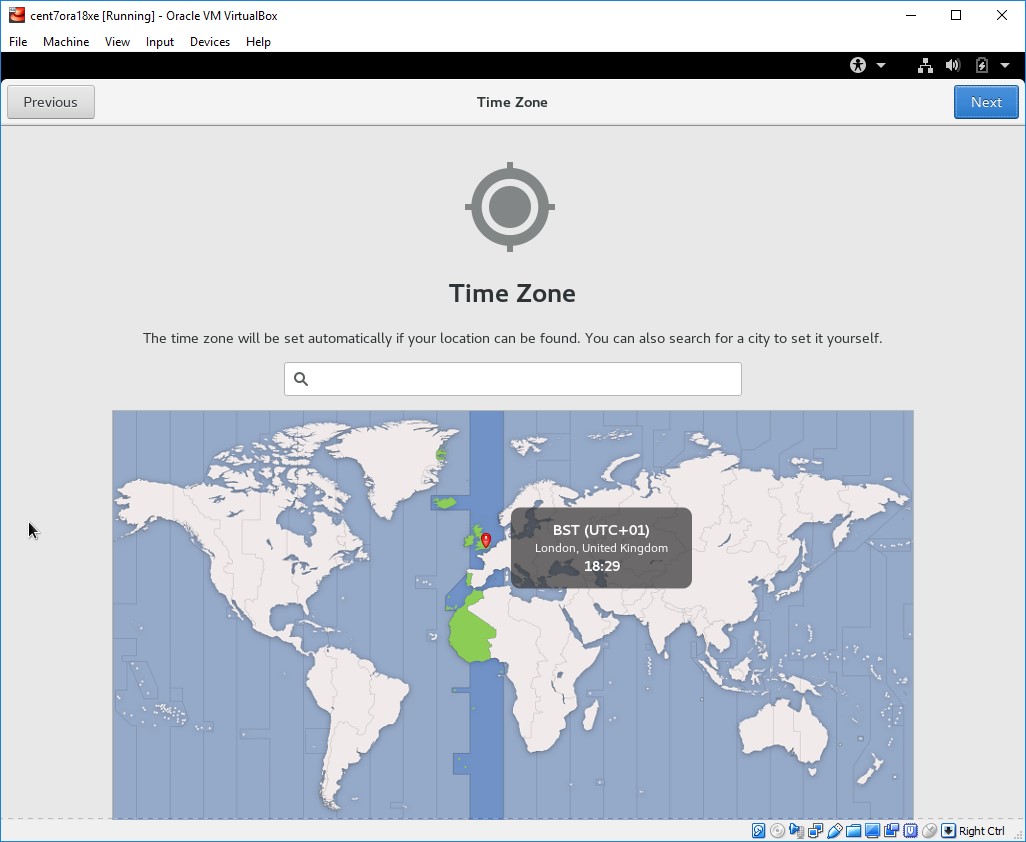
Choose ‘Skip’

Enter Full Name as oracle
Click Next.

Enter password, I’ve again choose oracle123
Click Next.

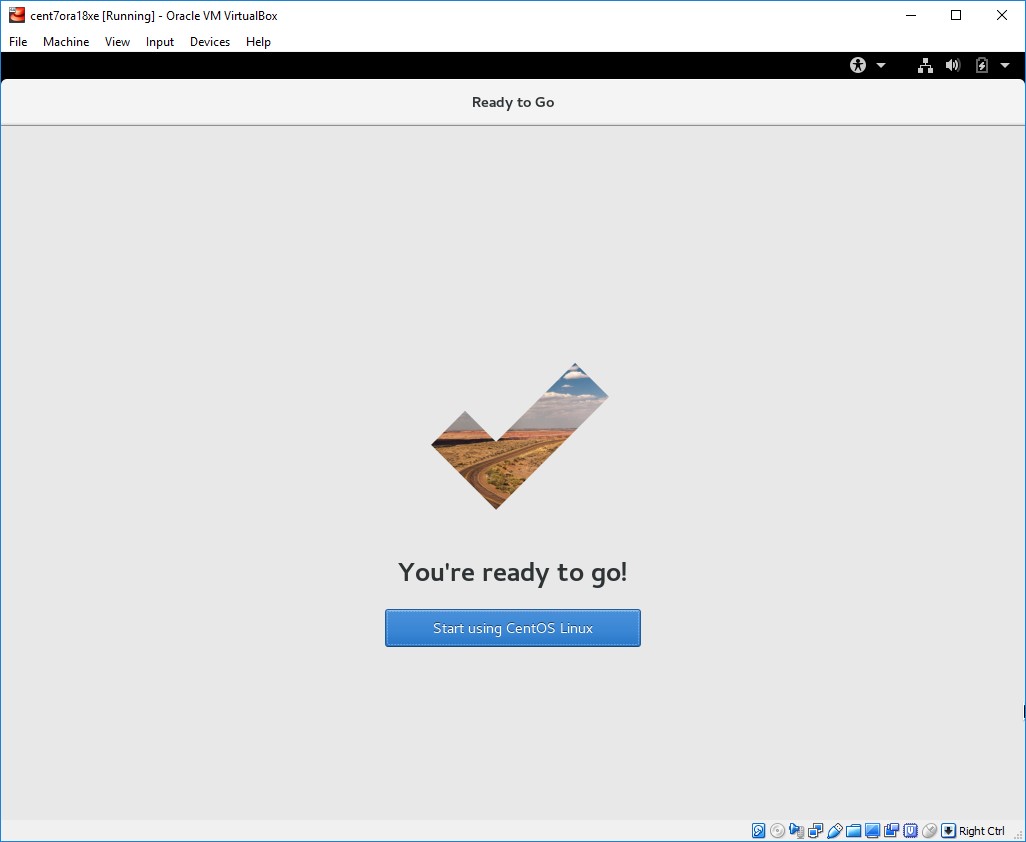
For ease of use drag terminal icon to the desktop
Applications -> System Tools -> Terminal
Now log in as root:
Click ‘Not listed?’ then enter root

Repeat initial log screens above
Next as ‘root’ install VirtualBox guest additions:
Devices -> Install Guess Additions CD image

After this step the shared folder we added earlier (which contains all of our s/w) should appear on our desktop, also the mouse will now be movable between our VM and host windows PC without having to press the right CTRL

Let’s turn screen lock off as well:
Top right hand corner, left click the network, speaker icon then left click on the spanner and screw driver circle icon.
On the left hand panel choose ‘Privacy’, then Screen Lock ‘off’

Review network settings and ensure network interface is enabled, click top right hand to bring up panel where you can choose ‘Network’

Clicking on the cog for each network interface ensure below are also checked:

Update Network Name/IP for host:
Edit /etc/hosts file and add:
192.168.56.71 centora1.localdomain centora1Test host with a ping
ping centora1

PING centora1.localdomain (192.168.56.71) 56(84) bytes of data.
64 bytes from centora1.localdomain (192.168.56.71): icmp_seq=1 ttl=64 time=0.040 ms
64 bytes from centora1.localdomain (192.168.56.71): icmp_seq=2 ttl=64 time=0.046 ms
Test an Internet site ping
[oracle@centora1 trace]$ ping www.bbc.co.uk

PING www.bbc.net.uk (212.58.244.66) 56(84) bytes of data.
64 bytes from bbc-vip111.telhc.bbc.co.uk (212.58.244.66): icmp_seq=1 ttl=54 time=14.6 ms
64 bytes from bbc-vip111.telhc.bbc.co.uk (212.58.244.66): icmp_seq=2 ttl=54 time=356 ms
Install Oracle XE 18C
We have already downloaded the install rpm’s (software) to our laptop share, so we can now proceed to install these.
Logon as oracle, then su -, to become root from a terminal
[oracle@centora1 ~]$ su -
Password:
Last login: Thu Oct 25 14:51:31 BST 2018 on pts/0
[root@centora1 ~]#
If we type df -h we can see our windows shared folder with our software we downloaded
[root@centora1 ~]# df -h

Filesystem               Size  Used Avail Use% Mounted on
/dev/mapper/centos-root   10G  5.0G  5.1G  50% /
devtmpfs                 1.9G     0  1.9G   0% /dev
tmpfs                    1.9G     0  1.9G   0% /dev/shm
tmpfs                    1.9G  9.4M  1.9G   1% /run
tmpfs                    1.9G     0  1.9G   0% /sys/fs/cgroup
/dev/mapper/centos-opt    35G   49M   35G   1% /opt
/dev/sda1               1014M  169M  846M  17% /boot
ORACLE18c_SW             954G  437G  517G  46% /media/sf_ORACLE18c_SW
tmpfs                    380M   24K  379M   1% /run/user/1000
/dev/sr0                  56M   56M     0 100% /run/media/oracle/VBox_GAs_5.2.20
Let’s install the software, there are 2 parts
– The Preinstall rpm that will complete oracle user setup, install software dependencies and adjust o/s settings
– Install the actual Oracle XE 18C software
Pre-Install Phase1: as root user
cd /media/sf_ORACLE18c_SW #or location of your software
yum -y localinstall ./oracle-database-preinstall-18c-1.0-1.el7.x86_64.rpm
Install Oracle XE 18C s/w Phase 2: as root user (allow 30 minutes for rpm install)
cd /media/sf_ORACLE18c_SW #or location of your software
yum -y localinstall ./oracle-database-xe-18c-1.0-1.x86_64.rpm
Creating and configuring a database
1. Logon as oracle and su to root
su -2. Run the configuration script (Allow 30 minutes)
/etc/init.d/oracle-xe-18c configureThis will prompt for a password for SYS, SYSTEM and PDBADMIN accounts, again I have used oracle123 as a standard password.
As per the installation documentation, below is a list of installed files and locations
| Location | Purpose |
| /opt/oracle | Oracle Base. This is the root of the Oracle Database XE directory tree. |
| /opt/oracle/product/18c/dbhomeXE | Oracle Home. This home is where the Oracle Database XE is installed. It contains the directories of the Oracle Database XE executables and network files. |
| /opt/oracle/oradata/XE | Database files. |
| /opt/oracle/diag subdirectories | Diagnostic logs. The database alert log is /opt/oracle/diag/rdbms/xe/XE/trace/alert_XE.log |
| /opt/oracle/cfgtoollogs/dbca/XE | Database creation logs. The XE.log file contains the results of the database creation script execution. |
| /etc/sysconfig/oracle-xe-18c.conf | Configuration default parameters. |
| /etc/init.d/oracle-xe-18c | Configuration and services script. |
| /opt/oracle/product/18c/dbhomeXE/network/admin/tnsnames.ora file. | Database TNS names file |
We now have a running Oracle XE 18C database which we can connect to.
TNS details
cat /opt/oracle/product/18c/dbhomeXE/network/admin/tnsnames.ora
# tnsnames.ora Network Configuration File: /opt/oracle/product/18c/dbhomeXE/network/admin/tnsnames.ora
# Generated by Oracle configuration tools.

XE =
  (DESCRIPTION =
    (ADDRESS = (PROTOCOL = TCP)(HOST = centora1.localdomain)(PORT = 1521))
    (CONNECT_DATA =
      (SERVER = DEDICATED)
      (SERVICE_NAME = XE)
    )
  )

LISTENER_XE =
  (ADDRESS = (PROTOCOL = TCP)(HOST = centora1.localdomain)(PORT = 1521))
Let’s edit the tnsnames.ora file to add our Pluggable database details:
cp /opt/oracle/product/18c/dbhomeXE/network/admin/tnsnames.ora /opt/oracle/product/18c/dbhomeXE/network/admin/tnsnames.bak
vi /opt/oracle/product/18c/dbhomeXE/network/admin/tnsnames.ora, add below:
XEPDB1 =
  (DESCRIPTION =
    (ADDRESS = (PROTOCOL = TCP)(HOST = centora1.localdomain)(PORT = 1521))
    (CONNECT_DATA =
      (SERVER = DEDICATED)
      (SERVICE_NAME = XEPDB1)
    )
  )
We can also bypass the TNS NAMES file and use EZCONNECT format to connect to our database:
sqlplus system/oracle123@centora1:1521/XEPDB1
sqlplus sys/oracle123@centora1:1521/XEPDB1 as sysdba
The port should be 1521, but if you have reinstalled or rerun the database configure script it may assign another PORT for listener.
Log on as oracle user and test:
we can use ‘. oraenv’ to set the user environment, this takes the database name ‘XE’ as an argument
. oraenv

ORACLE_SID = [oracle] ? XE

The Oracle base has been set to /opt/oracle

[oracle@centora1 ~]$ sqlplus / as sysdba
SQL*Plus: Release 18.0.0.0.0 - Production on Tue Oct 23 01:34:31 2018
Version 18.4.0.0.0
Copyright (c) 1982, 2018, Oracle.  All rights reserved.
Connected to:
Oracle Database 18c Express Edition Release 18.0.0.0.0 - Production
Version 18.4.0.0.0

SQL> select name from v$database;

NAME
---------
XE
Or test a remote connection using above TNS details
[oracle@centora1 ~]$ sqlplus system/oracle123@XEPDB1
SQL*Plus: Release 18.0.0.0.0 - Production on Tue Oct 23 13:34:42 2018
Version 18.4.0.0.0
Copyright (c) 1982, 2018, Oracle.  All rights reserved.
Last Successful login time: Tue Oct 23 2018 13:34:30 +01:00
Connected to:
Oracle Database 18c Express Edition Release 18.0.0.0.0 - Production
Version 18.4.0.0.0

SQL> select name from v$pdbs;
NAME
--------------------------------------------------------------------------------
XEPDB1
Database Stop/Start
To enable XE database to stop and start automatically with our virtual machine, we need to enable this as below:
Log on as root user: su –
systemctl daemon-reload
systemctl enable oracle-xe-18c
We can still use standard Oracle command stop and start db as below.
Stop database: shutdown immediate
Start database: startup
/etc/init.d/oracle-xe-18c restart, can be used to recycle db/listener
/etc/init.d/oracle-xe-18c stop|start, to stop/start db/listener as well
The database log will be by default below:
/opt/oracle/diag/rdbms/xe/XE/trace/alert_XE.log
The listener log will be by default below:
/opt/oracle/diag/tnslsnr/centora1/listener/trace/listener.log
Using Enterprise Manager Express
Install Flash which is needed for Enterprise Manager to work
As root user:
su -
yum -y install http://linuxdownload.adobe.com/linux/x86_64/adobe-release-x86_64-1.0-1.noarch.rpm
yum install flash-plugin
To make EM Express available to remote clients, start SQL*Plus and log in as SYSTEM and execute this procedure:
As oracle user
sqlplus system/oracle123@XE
EXEC DBMS_XDB.SETLISTENERLOCALACCESS(FALSE);
Exit;
Start FireFox internet browser:
Applications-> Internet-> FireFox Web Browser
Use URL: https://localhost:5500/em
Will be promoted on browser, connection is not secure
Select ‘Advanced’ and then ‘Add Exception’

Click ‘Confirm Security exception’

Log on to Enterprise Manager Express 18c
Username: SYS
Password: oracle123
Click as sysdba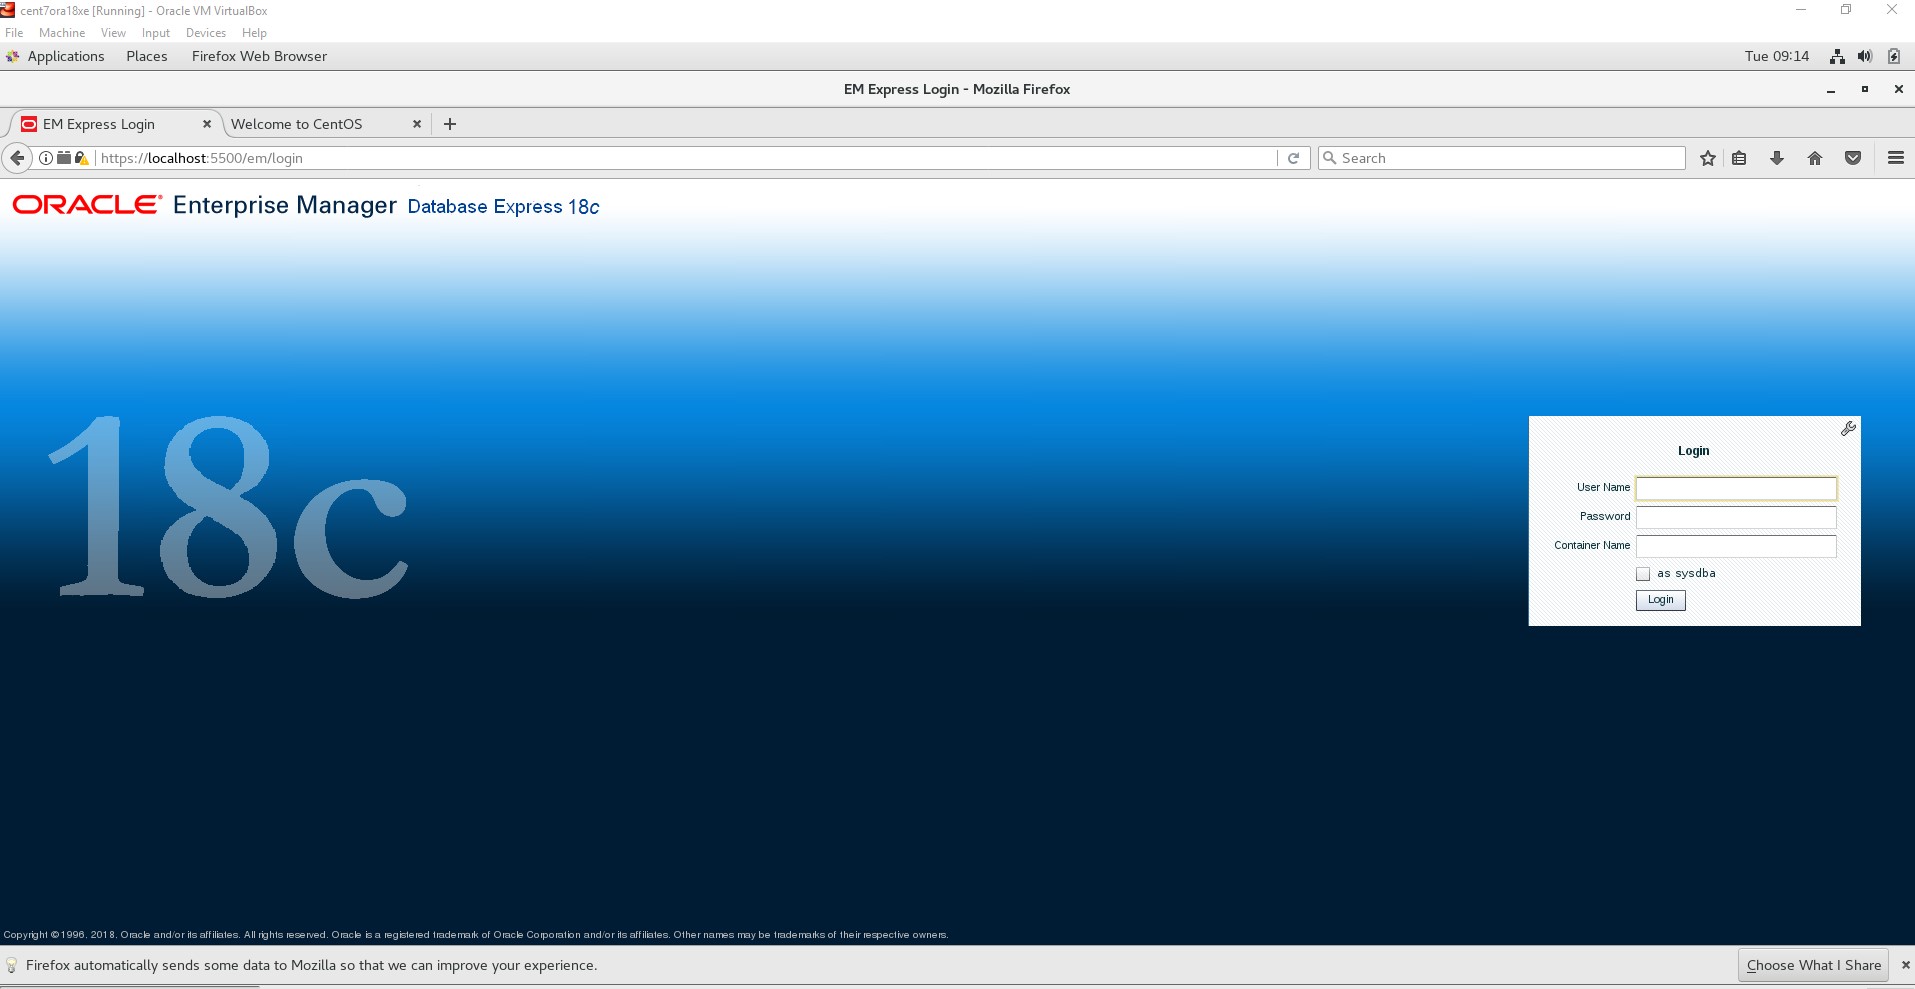

Backing up the database.
The Oracle Express database we have just created out of the box is not backed up, also it does not run in archive log mode by default. Let’s assume Oracle expect us to take a backup of this database using datapump logical dumps rather than a physical backups with RMAN.
Create a simple backup script:
As o/s user oracle:
1. Make a directory to hold the dumps at o/s level
mkdir /opt/oracle/DATAPUMP_DUMPS2. Create a directory object in the database to reference backup location
. oracle <<< XE

sqlplus sys/oracle123@XE as sysdba
CREATE OR REPLACE DIRECTORY DATAPUMP_DUMPS as '/opt/oracle/DATAPUMP_DUMPS';
exit

sqlplus sys/oracle123@XEPDB1 as sysdba
CREATE OR REPLACE DIRECTORY DATAPUMP_DUMPS as '/opt/oracle/DATAPUMP_DUMPS';
exit
3. Create Script to run backup
cd DATAPUMP_DUMPS
vi oracle_datapump_backup.sh
#!/bin/bash
export PATH=/usr/local/bin:${PATH}
export ORACLE_SID=XE
export ORAENV_ASK=NO

. oraenv

export DB=${1}

expdp \'sys/oracle123@${DB} as sysdba\' DIRECTORY=DATAPUMP_DUMPS DUMPFILE=${DB}_oracle_backup.dmp LOGFILE=${DB}_oracle_backup.log FULL=YES REUSE_DUMPFILES=YES
Change the permissions of script to executable:
chmod u+x oracle_datapump_backup.sh4. Schedule the backup in crontab
crontab -e
00 20 * * * /opt/oracle/DATAPUMP_DUMPS/oracle_datapump_backup.sh XE
00 21 * * * /opt/oracle/DATAPUMP_DUMPS/oracle_datapump_backup.sh XEPDB1
Reboot test
Good point to reboot our virtual machine to see all components restarted ok, as root user
su -
reboot now
Once the system comes back log on in as oracle and check Database is available:
Remove and De-install Oracle XE 18c
This task is destructive and unless you have a backup of data from database you will lose all, do not run this step, it’s for information only.
1.logon as root
su -2. Deinstall Database, Remove datafiles, Remove Listener and its config, there is no prompt it just runs:
/etc/init.d/oracle-xe-18c delete3. Remove Oracle XE 18C software:
yum remove oracle-database-xe-18c4. Optional step if Oracle XE was only remain Oracle database and software, remove pre-install rpm software:
yum remove oracle-database-preinstall-18c.x86_645. Clean up leftover directories and logs:
rmdir /opt/oracle/oradata/XE/pdbseed
rmdir /opt/oracle/oradata/XE/XEPDB1
rmdir /opt/oracle/oradata/XE
rmdir /opt/oracle/oradata
rm -rf /opt/oracle/diag
rm -rf /opt/oracle/cfgtoollogs
rmdir /opt/oracle